Archive | Homemaking RSS feed for this section

Recycling Orange Peels into a Cleaner

Recently I had a friend who shared that she recycles orange peels into this awesome cleaner. You just add some white vinegar to a jar with some orange peels and let it set for about a week or two. Here is my mix with peelings from just one orange and about two cups of vinegar.

Just shake the jar a few times as it sits and the vinegar begins to absorb the citrus from the orange peelings. The vinegar will turn a tint of orange after about a week or so. You can add it to a spray bottle and use it to clean counters, bathroom surfaces, sinks, toilets, and floors. This homemade cleaner has a wonderful citric smell and leaves everything clean and smelling great.

2

Cayenne Pepper Keeps Pests Away

I read that cayenne pepper can be helpful at keeping pests away. Apparently mice, squirrels and other pests don’t like the smell of cayenne pepper. I have been having a problem with mice getting in my greenhouse and eating my tender seedling plants so I wanted to give this idea a try.

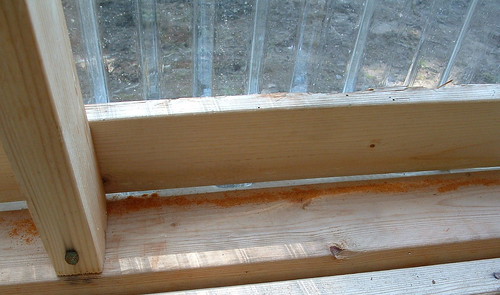
I have also read that ants and some other bugs don’t like cayenne pepper either so this may be a good solution to deter them too. I bought a 50 cent bottle of cayenne pepper and have sprinkled it generously all around the greenhouse as shown above. So far it appears to be working. My seedlings haven’t been getting eaten overnight like they had been but lets give it some time to see if this really works.

It’s been about a week now since I first spread some cayenne pepper around in my greenhouse. The plants have been left alone and it doesn’t appear that anything has been getting in and eating them. So if you have been having problems with mice or other such pests, you might try this useful idea of applying cayenne pepper around the area to repel them.

Application: Sprinkle the cayenne pepper all around areas where you want to keep the pests away. Especially apply cayenne pepper in holes and openings where the pests are entering. Re-apply every few weeks to keep the strong smell present for the best results.

Using Coffee Grounds on Furniture Scratches

Using old coffee grounds for something useful seems like a great idea. So I set out to find some useful ideas for coffee grounds. As you might guess, there are many suggestions for reusing or recycling coffee grounds. I’m not going to bore you with a list of 50 things that you might try but let me share one useful way to use old coffee grounds.

First I have read that coffee grounds can be a good fixer for scratches on your furniture. So this was my first test.

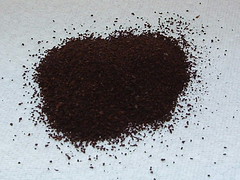
I took some coffee grounds and to see if it would fix my scratched bed frame that we bought 2nd hand. I rubbed some damp coffee grounds along and around the scratches gently. I then wiped off the grounds and cleaned up the surface with a towel. The results were that the scratches were hidden and not so noticeable but there were still there. I then tried the coffee grounds on a darker coffee table that had a few scratches. The results were much better and the minor scratches were nearly gone and not really noticeable at all after applying some recycled coffee grounds on the scratches.

The bottom line — Using coffee grounds does help hide scratches on wood furniture. It appears the darker furniture scratches are hidden better with an application of old coffee grounds than light-colored furniture. So if you have some scratches on your wooden furniture, give this useful idea a try. You have nothing to lose but some scratches, right?

6

Caring for Cast Iron

I have used cast iron for cooking for years. The secret of using cast iron pans and dutch ovens is how you care for the pots before and after use. The first most important thing before use is the proper seasoning. If the pot or pan isn’t seasoned thoroughly you will find cooking in it is miserable. Everything sticks in it, it looks rusty, and doesn’t smell good. If you have any of these issues, your pan isn’t seasoned properly but take heart. Even the worse cast iron pots and pans can be corrected with the proper seasoning.

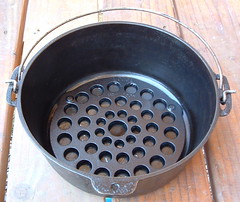
Let’s take a rusty dutch oven that I recently obtained for example. It had rust spots on the outside and the inside. It had a rough and dried-out look about it on the inside too. But I knew with proper care, I could restore this pot to good usable condition. I didn’t take any pictures of the dutch oven before I worked on it but just let me say it was in need of some serious TLC.

Here is the inside lid after I applied oil to the inside and outside and put it in the oven to season it up.
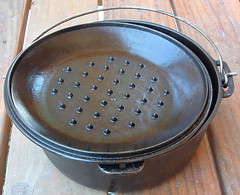
Steps to Seasoning your Cast Iron: Wipe with cooking oil, I like to use Olive oil, on the inside and the outside. If you have a dutch oven that is in bad condition, place it on a cooking sheet inside your oven at about 300-350 degrees. I left mine for a half hour before checking. Check the progress and turn the lid if necessary. Make sure its getting hot enough for the oil to be absorbed into the cast iron. Add more oil if needed so it has a generous amount of oil on the cast iron. Let it bake for another 30 minutes so it has baked for a full hour.

Re-apply more oil to the inside and outside. Wipe the oil around with a paper towel. I always leave a little excess oil inside the pan so it can adsorb even more.

An important tip: Never use soap on your cast iron. Rinse out the pan in the sink and scrape out any food. Boil water in the pan and use a nylon scrubber to get any hard stuck stuff off of your cast iron. I also reminded that the Boy Scouts use dirt or sand to scrub out their cast irons pans when they are camping. Then they boil water in the pans before adding some oil to season the pot for the next use.

Here is my favorite large cast iron fry pan. It is all seasoned after the last time I used it. I don’t know if the picture shows it well enough but this pan has a wonderful seasoned finish to it. When I cook in this pan, it’s almost like using a non-stick pan.

Once a pan has a good seasoned surface like the cast iron skillet above, you can just rinse it out in the sink after use. Boil water in it if necessary on the stove to get it clean. Once it is clean, I pour some cooking oil into the pan and put it on the burner on medium until the oil heats up good. Wipe the oil around with a paper towel making sure you get the inside of the pan well oiled. Leave it on the burner for another few minutes. I usually turned the burner off and just let it cool down and finalize the seasoning process at this point.

A final note here is my dutch oven stored. You don’t want the lid left on tight but leave a gap so it can breathe. I put a folded paper towel inside the lip to keep the lid open with a gap between the pot.

3

Baking Soda in your Vacuum Bag

Baking soda has so many different uses but I wanted to share one useful idea that I recently tried. I put baking soda in my vacuum cleaner bag with wonderful results.

Sometimes when I vacuum, the room ends up with that stale, musty odor. So I added about a 1/4 cup of baking soda inside my vacuum bag. I just sprinkled it inside the round opening of my bag and reattached the bag to my vacuum cleaner. And off I went vacuuming.

The result was a pleasant, odor-less smell after I finished vacuuming. Baking soda has long been known for its odor absorbing abilities and it works well in a vacuum cleaner bag too. Oh and one more tip, buy your baking soda in a 4 pound box as shown. It is much more reasonably priced that way than buying the smaller, more expensive little boxes.

1

Homemade Liquid Laundry Soap

Here is my recipe for making homemade liquid laundry soap. I have tested and used this soap for nearly a year now with great results. It cleans clothes well and is also a great stain remover.


Supplies Needed:

  • 6 quart stove top cooking pot
  • 2 gallon plastic bucket for final soap container
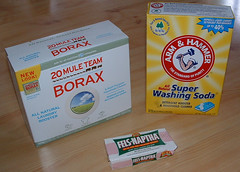
  • 1/2 bar of Fels-Naptha laundry soap
  • 1/2 cup Arm & Hammer washing soda
  • 1/2 cup 20 Mule Team borax powder
  • 8-10 drops of essential oil (Optional)

Directions:

Grate 1/2 of the bar of Fels-Naptha soap and place in cooking pot. Add 6 cups water and heat gently over low to medium-low heat stirring occasionally until the soap melts. Keep the heat low as not to allow the soap cooking to bolt while the soap flakes are melting.


Once the soap flakes have melted, add the washing soda and the borax stirring until all ingredients are dissolved.

Add 4 cups of  hot water into the cooking pot and stir well. I added 8-10 drops of lavender essential oil to the soap mix at this point. This is an optional ingredient but the oil gave my final soap just a pleasant hint of fragrance. Now add 1 gallon of hot water to the plastic bucket mix, add soap mixture from the cooking pot, and stir well again.

Let the soap mixture sit at least 24 hours to gel.

The soap has an egg look to it. Here is a photo taken after I used a few scoops from the bucket. As you can see from the picture below, it has a crust on the top and that runny egg look underneath. But you just scoop out a glob and it works great for washing.

I use 1/3 cup of soap in my top-loading large washer. For best results I place the soap in the washer and use a little hot water to dissolve the soap before placing my clothes into the washer. Also this laundry soap is a low sudsing soap so don’t be alarmed when you don’t see many suds while your clothes are washing. Additionally this soap can be used for stain treatments by either pre-soaking or spot treat the stain directly with a small amount of soap before washing.

2